July 26, 2012

What's In The Bible - DVD Review


I have never heard of these new DVD's before, which are from the creator of Veggie Tales, Phil Vischer.  They are brand new, so I was excited for the opportunity to check it out.

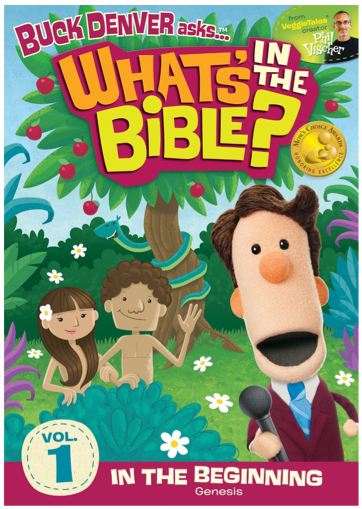
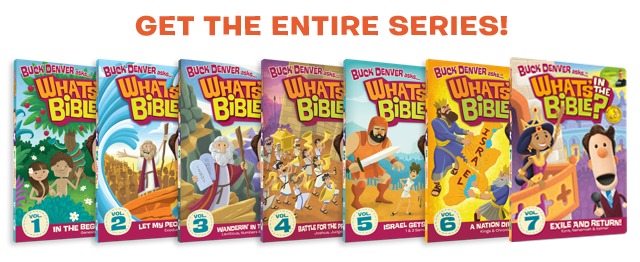
First off, they are nothing like Veggies Tales.  Well, okay, they are a little like Veggie Tales, in that they are geared toward children and feature silly songs, but not with Larry.  They are just fun songs. But rather than featuring stories from the Bible or character lessons like Veggies Tales, these aim to teach children all about the Bible, from Genesis to Revelation.  The video I received is the first in the series, Volume 1, In The Beginning.  There are 7 videos in the series altogether.


Inside the DVD case there are a couple papers: one has an access code for a digital copy of the video, and the other is a brochure.  On the front of the brochure is some brief information about the video, inside is a coloring page, and on the back are some questions for parents to ask kids after the video to see what they learned.

Okay, onto the video content.

At first I was a little turned off by the characters in the video, because the voices are very similar to those of the Veggie Tales characters.  They obviously use the same people to do voices, and I guess their range is limited.

The characters are funny, though, and we had a lot of laughs while watching the video!  Mind you, I have four children, age 13, 11, 8, and 5, and we all watched together.  We were all laughing! There is some unexpected, really funny lines in there that got us cracking up!

Some of the songs were really cute, creative, and funny.  Some were.... ok.  My favorite was one where the Sunday School lady was singing a song, and at the end, she doesn't know how to rhyme the last line, and she says "blah, blah, blah, dungle" to rhyme with jungle.  That one had me rolling!

I also appreciated the fact that they teach the kids how the Bible is divided up (Old Testament, New Testament, different books, etc.), what the word "testament" means, and why the Bible is divided up the way it is. It also went into detail about how the books were chosen to be in the Bible, what the Apocrypha is, the Septuagint, and who likely wrote the books of the Bible.  These are points that are sadly not usually presented in Sunday school classes, but I believe are important to knowing the history of the church, the Bible, and why we can trust its content.

There were a couple of things about the video that would keep me from purchasing the rest of the set, however.  Now, mind you, this is my personal opinion, and these points might not bother you.

First, this video discussed Genesis, which means Creation.  This can be a heated topic of discussion as there are so many varying beliefs regarding Creation, evolution, and a blending of the two.  But my personal belief regarding Creation is that God completed Creation within six literal days, not involving a "big bang", and not involving millions of years.  That is my personal belief, but it's one I hold onto very strongly.

In the video, the puppet characters begin explaining the Creation, stating that God created the universe with a "big bang".  Then Phil Vischer takes over and explains that there are different theories regarding Creation, and that we are not sure of any of them, because of the different interpretations of the Bible. This bothered me.  I personally believe in a literal six-day Creation, and I choose to trust what the Bible says. I don't want to get into the Creation debate here, but this difference in theology is enough to keep me from buying these videos.

As I said, that is my personal belief, so if you don't have a problem with the teaching that God might have used millions of years, or a big bang, then this aspect won't bother you.

My second point of contention is with one of the puppet characters.  He is the only African-American-looking puppet (or person, for that matter) on the program.  That bothered me a little bit, because save for one character who was blue, the rest of the characters are Caucasian-looking.  This alone wouldn't keep me from buying the video, however.  It's the voice they chose for the African-American character.  He had a gravelly voice, kind of like Louis Armstrong.  I don't know, it just made me cringe.  Why couldn't he have a regular voice?  It reminded me of the way African-Americans used to be portrayed in movies, with the silly voices, dressed poorly, etc.  He only appears a couple times and he isn't one of the main puppet characters.  But it just made me think, "What?" Maybe I'm being overly sensitive, but it struck me as odd, awkward, and wrong.

There are bonus features on the video that we enjoyed watching, especially the blooper reel!  There are a couple videos that didn't make the cut, and also a cartoon short called Quacky's Questions that is cute.

There are also extras that go along with the videos that you can access here:
http://www.whatsinthebible.com/activities

These include:
-coloring pages
- Bible flashcards
- Study Guide
- and more.

 I would be curious to see what the other videos teach, but I am reluctant to buy them for the above reasons.

"I was selected for participation in this review and given the What's in the bible DVD as a member of The Homeschool Lounge Review Team. All thoughts and opinions are my own."


July 4, 2012

Taco Soup

This soup is hearty, healthy, and tastes just like a taco in a bowl.  The best part about it is, it's super easy to make!  You can make it either vegan using veggie broth and sans cheese, or vegetarian with cheese.  This recipe serves 6.


Ingredients

2 15 oz. cans pinto beans, drained and rinsed
2 15 oz. cans diced tomatoes
1 7 oz. cans diced chilies
1 medium onion, chopped
4 cups water or broth (chicken or vegetable)
2 Tbsp. chili powder
1 Tbsp. garlic powder
1 tsp. ground cumin
1 tsp. paprika
1 Tbsp. dried cilantro
1 Tbsp. Mexican oregano
Salt and pepper to taste


For garnish:

6 corn tortillas, sliced into strips (or a bag of tortilla chips)
shredded cheddar cheese (or any of your choice)
shredded cabbage
chopped green onions
sour cream
hot sauce

Directions

In a Dutch oven heat 2 tablespoons canola oil over medium heat.  Add the onions and saute until soft.  Stir in all the rest of the ingredients except for the tortillas.


Bring to a boil, and then reduce to a simmer.  Allow to simmer for 15-20 minutes.


While the soup is simmering, heat about a cup of canola oil in a small skillet, over medium heat.  You can test when the oil is ready by using one tortilla strip.  If you place the strip in the oil and it sizzles and bubbles immediately, the oil is ready.  Place the strips for one whole tortilla in at a time.  When they are slightly brown and firm when touched with tongs, then you can remove them and place on paper towels.  Sprinkle them with salt immediately.  Continue to fry the remaining tortilla strips.

 To serve the soup, ladel one spoonful of soup in a bowl, and top with your desired garnishes.

June 27, 2012

Menu Board

Okay, I came across this menu board idea on Pinterest.  If you've not heard of Pinterest, where have you been?!  Just kidding.  Pinterest is a site that "lets you organize and share all the beautiful things you find on the web. People use pinboards to plan their weddings, decorate their homes, and organize their favorite recipes."  So, it's basically virtual bulletin boards.

Someone else actually posted it on Pinterest and it showed up on Facebook, which is where I saw it originally.  After following the link, I discovered there was so much on Pinterest that I could use, so I signed up, and then pinned the site where this menu board was created.

We used to spend hours trying to think of meals for the week.  I mean, it was EXCRUCIATING!  I had tried a couple of sites where there are already menu plans created for you, you just print it out with the ingredients and recipes.  Those each worked for about one week, until we realized we don't like any of their recipes. So we were back to sitting down with our recipe book, cookbooks, and the computer, to find any recipes we could that sounded appetizing.

Until I saw this idea.  I have to say, this has literally revolutionized the way we plan our meals!  Here's a picture of my finished product:


This board uses little cards, with a dinner meal listed on one side, and the ingredients on the back.  To plan meals, I take cards from the bottom box, place them in the clips on the board on the days I want to have that meal, and then write out the ingredients on my shopping list. That's it, I'm done.  When I'm ready to plan the next week, I remove the cards and put them in the top box.  This way it rotates through, and then I start over when the bottom box is emptied.

To set this up I went through our recipe files and collected all the recipes we use that are "keepers", which made me clean out my recipe binder in the process, discarding any recipes that were not "keepers" (I mean, why keep them if they were awful?).

Then I created a table in Word with two columns.  I put the name of the recipe in the left column, and the ingredients needed in the right column.  So when I print it out and cut out the recipes, I can fold them over onto themselves.


I followed the directions on the original blog to build it.  I bought an 11x14 frame, and a scrapbook paper pack that has coordinated papers and stickers, for $5 each.  I also bought a couple boxes of 16 count crayons for the boxes.  I already had self-laminating sheets on hand for the cards.  However, after laminating a bunch, I realized it wasn't necessary and it was more time-consuming, so half of my cards are laminated and half aren't.

To design it I just used different papers from the scrap pack to fit on the mat inside the frame.  I also covered the crayon boxes with more paper, and used some sticker borders to trim them out.

I'm so excited I got this done!  I still have a few recipes to add and print out.  I also made a couple cards that say "Eat Out" for lazy special occasions, and "Try New Recipe" to mix things up.  If the recipes work, I'll make new cards for those, too!  Another option I'll be adding is cards for lunches, since I frequently draw a blank when it comes to figuring out what to have for lunch.  Then I'll add a third box to hold those cards.

So that's it!  If you want more details on how to create it, I encourage you to visit Claire's blog, where I got the idea.  I do not want to pretend that I came up with this on my own, because God knows I'm not that creative! 

Do you have a method that works for you?  What is it?


June 25, 2012

Recipe Binder

If you're like me and you like to try different recipes, then you know how much of a struggle it can be to keep all those recipes organized.  I will find a recipe online and either print it out or, when the printer was low on ink, write it out on notebook paper.  If the recipe tanked, then it was easy to figure out what to do with it - round file.  But if it actually turned out to be good and something my family enjoyed, then I'd have to find a way to keep it.

I've had a recipe binder for years, but never quite figured out a way to streamline the process from printing the recipe, filing it in the binder, and using it again and again; and - the tricky part - keeping the recipe clean while I cooked or baked, because I'm sloppy. 

I would take the recipe out, set it on the counter while I prepared it, and it would inevitably get something on it - oil or butter, juice from a piece of fruit, sticky honey, etc,.  Well, because I'm cheap and I don't want to keep printing out recipes over and over, I would keep it, even if it looked, well, like this:


Yeah, not too pretty. This one of my better-loved recipes, tried and true.

My other problem would be what to do with recipes that weren't on 8.5 x 11 paper, but on an index card, a post-it (yep, I have a couple), or some other form taken from a magazine or mailer. I can't exactly hole-punch them, so they would end up in the front pocket of the binder, never to be seen or heard from again.

So, I decided to streamline my recipe system, so that these issues would no longer be, well, issues.  First, I divided my recipes into categories - Breads, Main Dish, Pasta, Soups/Stews, Sides/Snacks, Sauces, and Desserts.  Then I found some dividers that are sturdy and have a pocket on the front.  They are also transparent so I can see those little recipes that might get hidden in there, like my recipe for Alfredo (which I just realized should be filed under "Sauces" instead of "Pasta").


I can also store full-page recipes there temporarily, until I can hole-punch it later (I'm a procrastinator, too).

But I still had the issue of how to keep my recipes clean while I was cooking.  Then one day it just came to me, like a flickering light bulb over my head:

"I already have a binder with a clear pocket in the front, I could just put the recipes in there!"

I heard angels singing, there were cherubs flying through my kitchen, and I saw a deer out front.  Okay, there wasn't a deer, there was a rabbit.  But I live in the desert and they're pretty common here.  But it WAS a special moment!


See?  It sits in there, completely protected from any mishap that I might happen to infringe on it.  Then, my binder gets dirty, but my recipe stays clean.  And, my binder can be wiped clean! (As you can see in the picture above, this recipe has endured war wounds, as well.)

My binder used to be decorated only by a piece of construction paper I cut to fit in the spine, labeled "Recipes" with a sharpie.  But I finally decided to decorate it with some pretty paper and stickers.


This system works perfectly for me!  How about you?  How do you organize your recipes?


June 11, 2012

2012/2013 School Year

One of my favorite times of the year is the time right before school is finished. It's not because we'll be on summer break, with lots of carefree time on our hands. Well, okay, that's part of it. I mean, come on!

But for me, it's because I love looking toward the next school year and planning what we're going to use. I love looking at curriculum possibilities, and different ways of organizing our homeschool and our schedule. If you are one of those that loves new school supplies or office supplies, then you know what I'm talking about. Except for homeschooling, it's that feeling, but on steroids!

I love to search online and in catalogs for things that might improve the way we do things, or replace something that just didn't quite work for us. Most of the time I browse just for fun, but with no intention of actually buying anything. Yeah, I can do that. I know many can't, but I'm strong-willed. Sometimes, though, I get the added thrill of looking to buy. I might need a new math program, or a new science book for my oldest child. Sometimes I'm just buying the next level of something we are already using, or the supplements that coordinate with it. For instance, our history curriculum uses real books for the lessons - biographies, historical novels, and literature - for each time period we're studying. So when we move onto the next year plan and the next time period, we need some of the books that go with it.

Truthfully, the majority of what I buy I find used. I mean, why pay $30 for something when you can buy it from someone used for $15, right? So I find what I want to use, and then I search and search for good used options. But sometimes I get lucky am forced to buy it new. I love hate that!

I've already searched for things that I need to get, and things I might want to get. I made a list, and now I'm checking it twice. Now the fun REALLY starts! Purchasing! And then I wait as package after package starts arriving at my doorstep. I'm getting giddy just thinking about it!

Then I get to sit down with everything and plan how to use it for the next year. I also get to plan our project, field trips, and days off at the same time! I already looking forward to Thanksgiving! Ha ha!

Anyway, that's a glimpse into my life right now. My next post I'll share how I plan our weekly schedules. Oooohhh! Dare to dream!

June 10, 2012

Portabella Mushroom Fajitas with Beans

I love that my husband is so creative! Once in a while, I find a creative spark and I can change a recipe a little, or come up with something different. But he does it all the time, and I reap all the benefits!

This creation was another one of his ideas. We were trying to come up with a dinner menu for the week, and were tired of the same old we've been having. We have a lot of great recipes that are favorites, but sometimes you just need something else.

So he came up with the idea of fajitas made with portabella mushrooms instead of steak or chicken. Let me tell you, they were FANTASTIC! Here's a picture of my plate. I couldn't wait to try them, as you can see.


I had a couple requests for the recipe, so here it is. Forgive me if it's a little vague.

Portabella Mushroom Fajitas
serves 6

Ingredients

6 Portabella mushrooms (about one per person, stemmed and cleaned
1 Red bell pepper, sliced
1 Yellow onion, saute cut
2 Green bell peppers, or Poblano peppers, sliced
Flour Tortillas, fajita size
2 Tbsp. canola oil
Seasonings
1 tsp. Cumin
2 Tbsp. Chili powder, or to your taste (I use a variety - Ancho, New Mexico, & California - but you can use whatever you have)
1 Tbsp. Garlic powder
Salt & Pepper to taste

Directions

In a large skillet, heat the oil over medium-high heat. Add the mushrooms, and season with the seasonings. I generally don't measure seasonings, because I've become accustomed to how much seasoning I like on my food. I guessed the measurements above, so if it's too much or too little, just adjust to your taste.

Saute the mushroom until they begin to soften and release some of their moisture. Next, add the peppers and onions. You can add more seasoning, but the veggies will grab some from the mushrooms, and the flavors will all start to marry pretty well, so you may not need to.

When the veggies and mushrooms are softened, it is ready to serve. Warm up some tortillas either in the microwave or on a griddle, and then spoon the mixture on top. If you're not vegan, or you're not afraid of a teensy bit of fat, put some sour cream on there, too! It's so good!

I hope you enjoy this recipe as much as we did!

June 9, 2012

New Chapter, Same Book

This past week was the end of a small, but impactful chapter in my life. I had started watching a couple of kids, a brother and sister, about a year and a half ago. It was to supplement our income so that we could get ahead with our bills and pay some stuff off.

I say it was impactful because it was a difficult time for our family. The children I was watching were experiencing some major shifts in their lives, so there were some issues that needed to be worked through. The tension in our house was constant, and it was a major stressor. Not to mention their mom's work schedule was constantly changing, so it was hard to settle into a routine.

It was also stressful because we were not able to do some things that we wanted. We also had to shift our school calendar to center around the public school calendar, so that we would have the same days off. When the kids had a half day at school, or a day off for a holiday or other reason, they would be at our house the whole day. So those were days when we had to cut lessons short, or cut out the school work completely. We couldn't take field trips that we wanted because we had to be able to come back to pick up the kids at a certain time.

So this week was their last week here. Their mom was able to find a job that she does from her house, so she will be able to care for them before and after school. And now the house is full of just my kids, and any other kids that are here are invited friends. We will slowly get back to having our own schedule again, and getting used to being able to leave and not have to think if there's enough time in the afternoon.

I now have that feeling you get sometimes when you realize you've done all the chores, the cooking, the shopping, and there's nothing left to do but relax and read a book. It's a rare feeling, but it's the only feeling I can equate it to. I now have time. Time with my kids. Time to be able to finish the book I've put off for a year. Time to read a book, or a whole series if I want. Time to work on some projects that I have been putting off for over 13 years now. I just feel so peaceful, and light.

Thank you God, for answering my prayer, and blessing me, yet again, in a way I could not have dreamed of. You never cease to amaze me. My heart is no longer encumbered and burdened, but filled with joy. I feel like I might burst! I praise you, Father, for your provision. You are Jehovah Jireh, my Provider. I love you and I thank you. In Jesus' name, Amen.

May 27, 2012

Things that make you go "grrrr!"

Scientist: Evolution debate will soon be history

Did you happen to catch this article?

Several things in this article bothered me. Aside from the fact that I don't believe in evolution, the part that bothered me the most was his reference to what I believe, as a Christian. I believe in a young earth. I don't believe the earth has existed for billions of years, but a mere 6-8,000. Maybe 12,000, at the most. I believe that because it just makes sense. Articles like this provide theological and scientific evidence that supports a young earth, instead of a billions-of-years-old earth. I know there are some Christians who believe the earth was created through evolution, or that God used evolution in his creation. I won't delve into that, because I want to focus on what really bothered me about the evolution article on yahoo.

You see, he could have just stated what he "knew" as a scientist, and leave the creation debate completely out of it. I know for a fact that not all evolution skeptics are Christian, or have any faith at all, for that matter. Some of the many skeptics of evolution are skeptic simply because it's a hard pill to swallow when you are shown ALL evidence. Some of the skeptics of evolution are actually SCIENTISTS! (gasp) It's not a theory that is supported by all in the scientific community. Only those who refuse to see any other possibility to the evidence that is gathered whole-heartedly believe in evolution, and whole-heartedly refuse to believe in God.

"Leakey insists he has no animosity toward religion." Really? Then why does he feel the need to mention the book of Genesis? It's because those who believe what is taught in Genesis are the most outspoken opponents to evolution. But they're not the only opponents.

What Leakey doesn't understand is that there are a lot of scientists (I don't know the exact number, but I would wager in the thousands) who believe, in light of various forms of evidence (geological, anthropological, astronomical, biological, etc.) that the theory of evolution just does not hold up. Many of these same scientists have since converted to Christianity because of this evidence. But Leakey, and others like him, don't want to take that into consideration. To him, all who believe in what the Bible tells us about the origins of the earth and of mankind, are simple-minded, holding onto "religion" because "people really need a faith." He doesn't want to consider that some people have found "a faith" BECAUSE of that scientific evidence!

Okay, I'm done.

March 20, 2012

Reading Eggs

Have you ever heard of Reading Eggs?


I had never heard of it, until recently. I received the opportunity to try it out in exchange for a review. Since I have a pre-reader in my house, this was a perfect opportunity!

Right away, we signed up and got started.

This program is really fun! You select which program to start on, either a pre-reading program, called Reading Eggs, or a program for children 7 and older, called Reading Eggspress. There is an option to take a placement test to get started at the right level, or you can start from the beginning. Once your child begins the program, there is a map of their level that guides them along the path to reading.


As you can see in the picture above, there is a large arrow that guides the child to their next lesson, so it's very easy to navigate. There are also links along the side for additional activities. Here's what the playroom looks like:


As far as the actual lessons go, they are thorough, with plenty of repetition, which is what little ones need when learning reading. Within each lesson there are about 10 different activities that the child must master before he can move to the next lesson. And each lesson ends with a fun, interactive book.

Also, as they complete the lessons they earn eggs, which are used as currency to buy stuff. They can unlock new places to visit or decorate as they move through the lessons, so there is always incentive to continue.


The only downside that we've come across in the lessons is that instead of focusing on all the letter sounds first, it starts teaching sight words. This confused my daughter and she had some trouble with those lessons. Instead of learning about the sound the letter 'T' makes, she's trying to read words like mat, sat, hat, etc. This was a little like putting the cart before the horse, so it can be confusing in that respect.

However, aside from that this is an excellent program and I am definitely considering signing up for the subscription once our trial period is up. They offer a monthly subscription for $9.95, a 6-month subscription for $49.95, or a full 12-months for $75.00, which works out to $6.25 per month - an exceptional bargain!


* I am participating in a sponsored campaign hosted by The Homeschool Lounge Review Team. I received a 5-week membership to Reading Eggs to facilitate this review. All opinions stated are my own.

February 14, 2012

Veggie Stir Fry

I adapted this super easy recipe from one we already make, which is fried rice. When I make fried rice, I usually start by making rice pilaf with rice, onions, garlic, and chicken broth. Then for the "fried" part, there was usually chopped chicken, lots of veggies, and eggs.

For this version, I made plain rice with veggie broth. Then I used the same process, without adding chicken or eggs.

There are a couple tricks to making fried rice, or authentic Chinese stir fry (authentic meaning, like you would get at a Chinese fast food joint).

The first trick is to use a wok. You can use a large, non-stick skillet, but the veggies tend to steam in it instead of fry, so there is a lot more moisture.

The second trick is just using a bit of sesame oil with regular veggie oil, and also some ginger. I keep a jar of minced ginger in the fridge because it comes in handy. You can also keep fresh ginger in the freezer and grate it when needed.

In this stir fry, I had red and green bell peppers, a head of cauliflower, a couple stalks of celery, two carrots, mushrooms and two jalapenos.


You can pretty much put in there whatever you like. I usually use broccoli and scallions, but I wanted to use cauliflower instead this time just for something different. I also usually have a yellow onion in there, but this time I didn't because I used up all the onions. ("You used up all the onions, on PURPOSE!")

Before you start the stir fry, you have to par-boil the cauliflower. You basically boil it for a few minutes and then immediately drain it and rinse it with cold water to stop it from cooking. This process guarantees it will be cooked and tender, but not mutilated baby food.

Once everything is chopped, diced, sliced, and ready to go, you heat up the wok on medium-high heat. Add some canola oil and a little bit of sesame oil (not too much, because it can quickly overpower all other flavors). Start by sauteing the garlic and ginger to flavor the oil a bit, but don't let them burn! Then you add all the other ingredients and just stir fry until they are the desired consistency.


You finish this off by flavoring it with some soy sauce, to your desired flavor. I usually just squirt the bottle into the pan until I think it's enough, but I kind of like a lot. You probably will want to add it little by little until it's flavored the way you like.

Now it's the best part... plating this beautiful concoction.


Make it all comfy cozy on top of a fluffy bed of rice, top it off with a little soy sauce (yes, more, because I like it, okay!), and then chow down!

February 3, 2012

Fettuccine with Low-Fat Cream Sauce

I'm following through on my promise to share recipes that we try, along with pictures and the results (did I promise that?). Anyway, today we tried a recipe called Fettuccine with Low Fat Cream Sauce with Summer Vegetables and Herbs de Provence. We got it from a gal called Emily Webber.com.

Let me start by saying it sounds fancy, with the "herbs de provence", but that is basically just a blend of dried herbs: savory, marjoram, basil, oregano, thyme, and rosemary. We didn't have rosemary or savory, so I just left those out.

The cream sauce consists of raw cashews* that are soaked in water for 4 hours, diced yellow squash, herbs de provence, salt, pepper, and some water.


I know, weird, right? I had some reservations, but you don't know until you try, so I tried. It's blended it up until it's the consistency of cream.


When I tasted the cream, it was surprisingly good! With the cashews it had a savory, nutty flavor, but with the herbs, and the subtle flavor of the squash, it had a nice balance.

The "Summer Vegetables" are carrot, baby spinach, cremini mushrooms, yellow or orange bell pepper, broccoli florets (I used some frozen chopped broccoli, because I didn't feel like "choppin' brocco-lay" {SNL reference}), yellow squash, zucchini, garlic, and tomatoes (we did not use tomatoes because we don't like tomatoes in cream sauce).


So after sauteing the veggies together, you add the cream sauce and heat it through. Then toss in the pasta and spinach and that's it. Not too taxing for me, since I don't like "slaving" in the kitchen all day. Here's the finished product:


Looks good, huh? And you know what? It was! Oh, I forgot to mention that we used penne instead of fettuccine because I thought I already had fettuccine on hand, but I didn't, and all I had was spaghetti, rotini, and penne. This dish was creamy, savory, hearty, and delicious. It's definitely a keeper!


* Tip: the term "raw" when referring to cashews is a misnomer, since cashews cannot be eaten raw out of the shell. There is a toxic resin that is under the shell, and in order to separate the nut from the shell without getting any of the toxic resin on the nut, it has to be steam-heated, until the shell opens and the nut comes out. So, in essence, the nut is cooked. I didn't know that until I was trying to figure out if I'd be able to find raw cashews at the store or not. For this recipe, I bought a can of whole cashews, unsalted.

February 2, 2012

Going Green

.... as in veggie. Yep, I never thought it would happen, but we have decided to change our diet to a mostly plant-based diet. Let me clarify.

This does not mean we're Vegan, although there is nothing wrong with being Vegan. I actually think it's a very good lifestyle to follow (to a point). I just don't want to create confusion, or to ruffle any feathers of those who are truly Vegan by claiming to be Vegan and not being truly Vegan.

Confused? Of course you are. When I say mostly plant-based diet, I mean that for the most part we are following a Vegan diet, but are not sticking to some of the ideals that most Vegans follow. We will still eat meat, occasionally. Some call this being Flexitarian, so maybe that's what we are. I choose not to label ourselves.

I also don't want to give the impression that we are changing our diet to save animals. It's a noble concept and I do feel that factory farming can be absolutely disgusting and atrocious. But I also believe that God has told us that we can eat meat if we want to, so I see no problem with it. In fact, I think meat tastes good.

We came to the decision to change our diet (finally) after watching the documentary Forks Over Knives. We had already considered the idea of going veggie before, but could not find the motivation to really commit. This documentary changed our perspective on food and gave us the motivation to change.

We started this right before Christmas and have continued. Honestly, it has been easier than I thought it would be. We are already used to cooking foods from scratch and trying a wide variety of recipes. We can whip up a batch of fried rice that is better than most restaurants! The hardest part about it is finding options for lunch, and eating out. But overall we have been doing great, feeling great, and losing weight.

So I will be writing about some of the recipes we try, how they turn out, sharing pictures, and hopefully encouraging others to give it a try.